Have you ever wondered how to achieve flawless, natural-looking hair with minimal effort? Glueless lace front wigs are the answer. A glueless lace front wig is a revolutionary alternative to traditional wigs, offering ease, comfort, and natural appeal without the mess of adhesives. These wigs blend seamlessly with your natural hairline and are beginner-friendly. In this guide, we’ll provide detailed, step-by-step instructions of how to put on a glueless wig, helpful tips, and answers to frequently asked questions, ensuring you can confidently install and maintain your wig.

What Is a Glueless Wig?
A glueless wig is designed with adjustable straps, combs, and sometimes an elastic band to ensure it stays secure without the need for adhesives like glue or tape. The lace at the front creates the illusion of a natural hairline, making it an excellent option for individuals who prioritize both aesthetics and convenience.
Benefits of Glueless Wigs
- No Damage: Avoids potential hair loss and skin irritation caused by glue.
- Time-Saving: Quick to install and remove, perfect for those with busy schedules.
- Versatility: Easy to switch between looks without a long-term commitment.
- Comfort: Lightweight and breathable, suitable for extended wear.

Step-by-Step Guide on How to Install a Glueless Wig
Step 1: Prepare Your Natural Hair
Before applying the wig, ensure your hair is clean and detangled. If you have long or thick hair, braid it into cornrows or twist it into flat sections. This creates a smooth base for the wig, preventing lumps and ensuring a snug fit. Use a wig cap to hold your hair in place. For those with short hair, simply slick it back using gel or mousse.

Step 2: Prep the Wig
Inspect the wig before wearing it. Adjust the straps located inside the wig to fit your head snugly. Some wigs come with elastic bands for added security; adjust these as well. If the wig is brand new, consider washing or conditioning it to make the hair more manageable and soft.

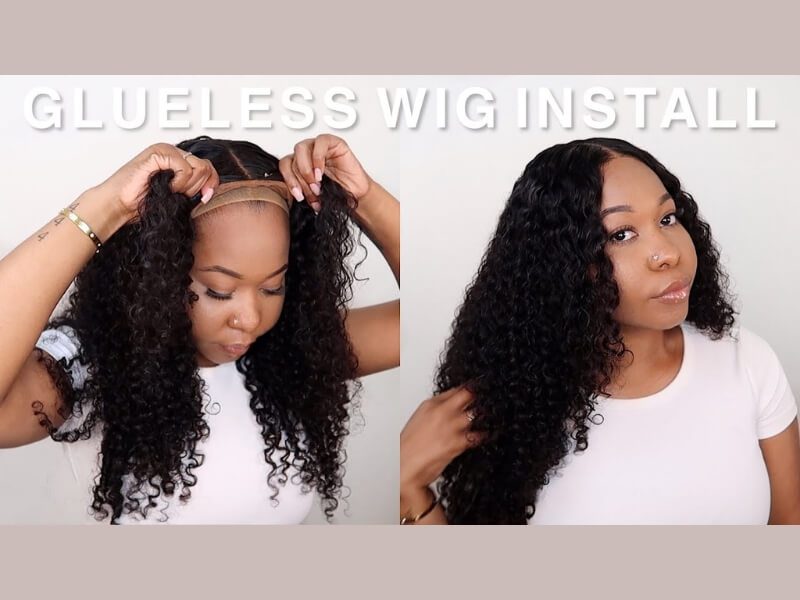
Step 3: Place the Wig
Position the wig on your head, aligning the lace with your natural hairline. Begin by securing the combs at the back of the wig, then work towards the sides. Ensure that the ear tabs are aligned evenly on both sides for a natural look.
Step 4: Trim the Lace
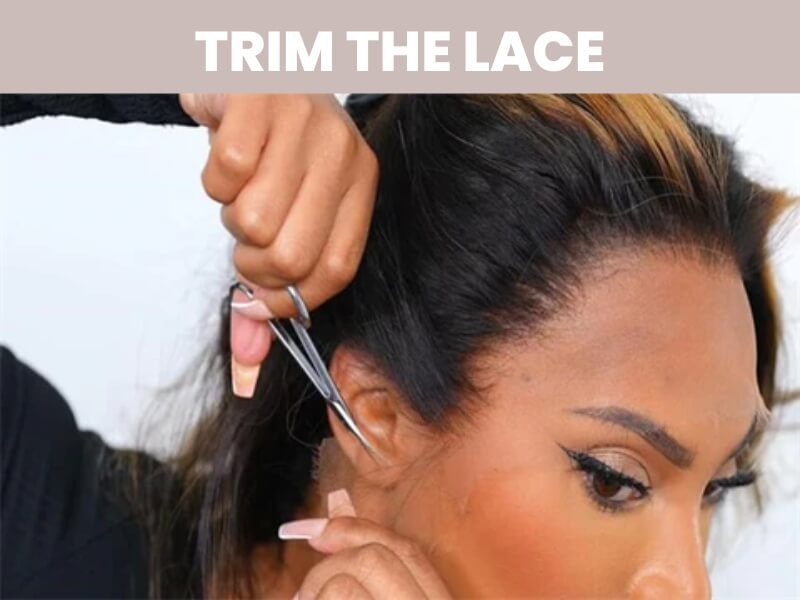
Carefully trim the excess lace around the hairline using a pair of sharp scissors. Leave about 1/8 inch of lace for a natural blend. Cut in small, precise sections to avoid damaging the wig. If you’re unsure, consult a professional or watch detailed tutorials online
Step 5: Secure the Wig
For added security, use a wig grip or adjustable band. These accessories ensure the wig stays in place, especially during active movements. Tie the wig band under your natural hair or around the nape of your neck for extra stability.

Step 6: Blend the Hairline
To make the wig look as natural as possible, apply foundation or a scalp tint that matches your skin tone to the lace. This creates the illusion of a seamless hairline. Use a small makeup brush to blend the product evenly.

Step 7: Style the Wig
Once the wig is secured, style it to your preference. Use a flat iron, curling wand, or blow dryer on low heat if the wig is made of human hair. For synthetic wigs, opt for styling methods recommended by the manufacturer. Always apply a heat protectant to prevent damage.
To finish, apply a holding spray or styling gel to tame flyaways. For a sleek look, tie a scarf around the edges for 10–15 minutes to set the hairline.

Tips and Tricks When Using a Glueless Lace Front Wig
- Tip 1: Invest in Quality Products
High-quality wigs with pre-plucked hairlines and adjustable features offer better durability and a more natural appearance. Consider purchasing from reputable brands or suppliers like Luxshine Hair.
- Tip 2: Customize Your Wig
Don’t hesitate to customize your wig. You can bleach the knots for a natural scalp appearance or pluck the hairline for a more refined look.
- Tip 3: Protect Your Edges
Wear a satin or silk cap underneath the wig to reduce friction and protect your natural edges. Avoid pulling the wig too tightly to prevent hair breakage.
- Tip 4: Proper Maintenance
Wash your wig every 10–15 wears using wig-safe shampoo and conditioner. Store it on a wig stand to maintain its shape and prevent tangling.
- Tip 5: Avoid Overstyling
Excessive use of heat tools or heavy styling products can damage the wig. Use gentle techniques to ensure longevity.

FAQ About How to Put on a Glueless Wig
Who Should Use a Glueless Wig?
Glueless wigs are ideal for beginners, individuals with sensitive skin, or those looking for a temporary yet secure hairstyle.
Can I Wear a Glueless Wig Every Day?
Yes, glueless wigs are suitable for daily wear. However, it’s essential to clean and maintain both the wig and your natural hair regularly to promote scalp health.
How Do I Prevent Slippage?
Use a wig grip or elastic band for additional security. Adjust the straps inside the wig to fit snugly on your head.
Can I Sleep in My Glueless Wig?
While it’s possible, it’s not recommended to sleep in any wig. Sleeping in a wig can cause tangling and reduce its lifespan. If necessary, use a silk or satin bonnet for protection.
Are Glueless Wigs Expensive?
Glueless wigs vary in price depending on their material and features. Human hair wigs tend to be more expensive than synthetic ones but offer better quality and durability.

Conclusion: Transform Your Look with Glueless Lace Front Wigs
Glueless lace front wigs are the perfect blend of convenience, style, and comfort. Whether you’re new to wigs or an experienced wearer, these wigs allow you to experiment with your look without damaging your natural hair. Follow our detailed guide on how to put on a glueless wig to achieve a flawless application every time.
Ready to elevate your hairstyle game? Explore the premium collection of glueless lace front wigs at Luxshine Hair today. As the top 1 Vietnamese hair factory, Luxshine Hair makes it easy to look and feel your best with high-quality wigs designed for every occasion


