
Hair Extensions
Nano Ring Hair Extensions Brown Body Wavy
Hair Extensions
Nano Ring Hair Extensions Brown Deep Curly
Hair Extensions
Nano Ring Hair Extensions Brown Deep Wavy
Hair Extensions
Nano Ring Hair Extensions Brown Kinky Straight
Hair Extensions
Nano Ring Hair Extensions Brown Natural Straight
Hair Extensions
Nano Ring Hair Extensions Brown Natural Wavy
Hair Extensions
Nano Ring Hair Extensions Brown Romantic Curly
Hair Extensions
Nano Ring Hair Extensions Brown Water Body Wavy
Available in 18 inch, 20 inch, 22 inch, 24 inch | 1-5 pieces, 100 grams per full pack
|
FULL PACK |
LENGTH |
PIECES |
WEIGHT |
|
Full pack |
16 inch |
4-5 pcs |
100grams/pack |
|
Full pack |
18 inch |
4-5 pcs |
100grams/pack |
|
Full pack |
20 inch |
3-4 pcs |
100grams/pack |
|
Full pack |
22 inch |
3-4 pcs |
100grams/pack |
|
Full pack |
24 inch |
2-3 pcs |
100grams/pack |
|
Full pack |
26 inch |
2-3 pcs |
100grams/pack |
|
Full pack |
28 inch |
1-2 pcs |
100grams/pack |
Nano Ring Hair Extensions have emerged as a trend of innovative hair extensions today, they take advantage of all the advantages and overcome the disadvantages of other types of hair extensions. Because a large number of customers are interested in this type of product, this is also the type favored by salon owners and wholesale hair vendors. Scroll down to learn what improvements stand out over others, how long Nano Ring Hair Extensions last, and where to find a reputable one. Let’s check now.
What Are Nano Ring Hair Extensions?
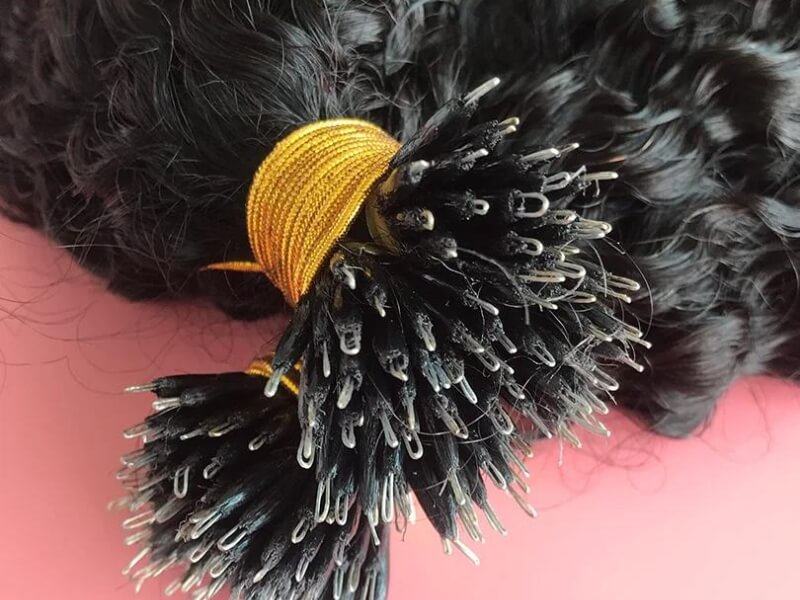
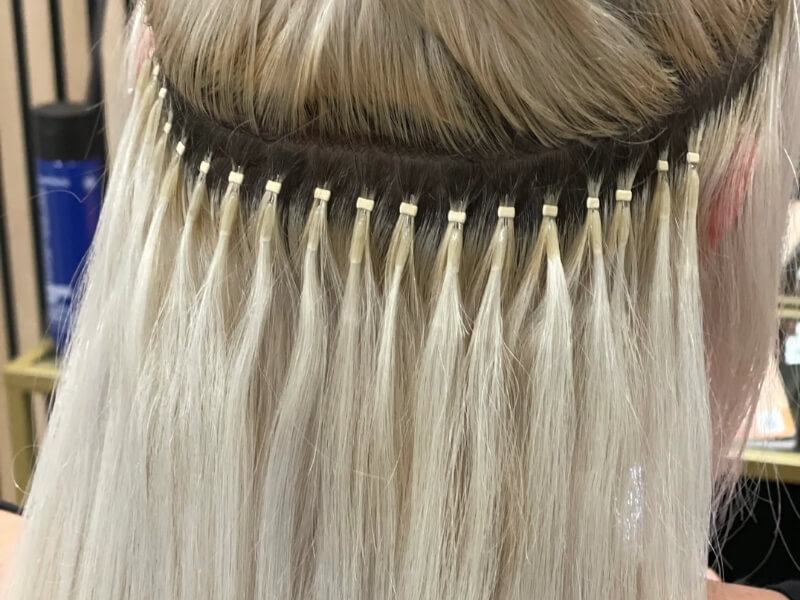
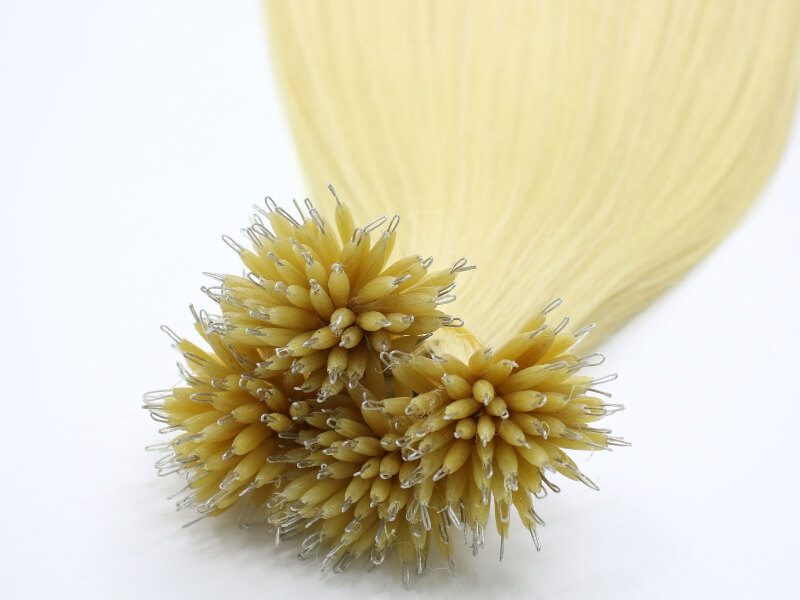
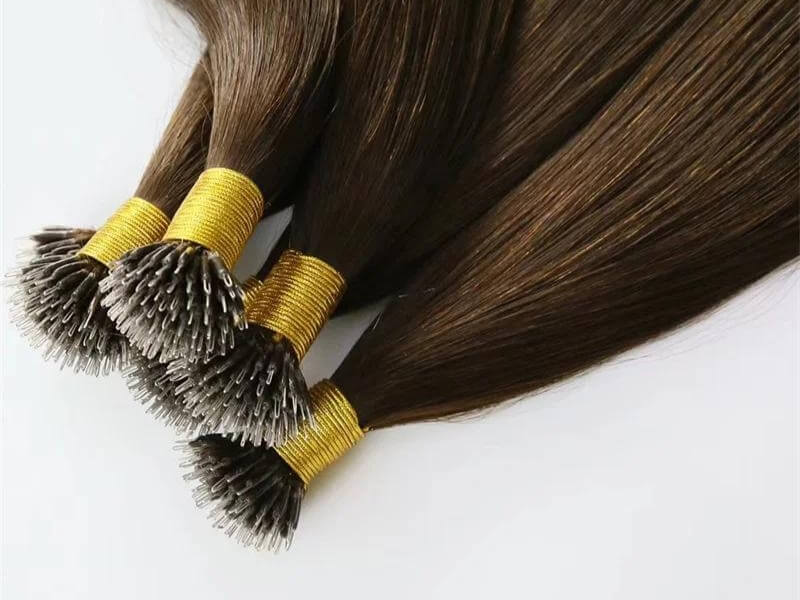
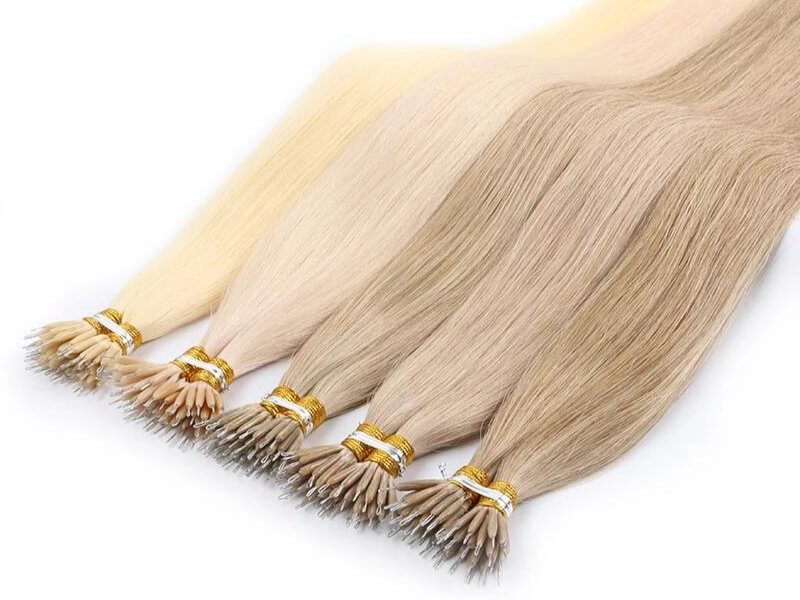
Nano ring hair extenisons are one of the types of Keratin tip hair extensions, a type of hair extension that connects each individual hair strand to a keratin protein bond. Nano Ring Hair Extensions represent a cutting-edge innovation in professional hair extensions, drawing inspiration from the established “Micro Ring” technique. Constructed from strands of human hair bonded with a robust keratin adhesive, Nano Rings feature an ultra-fine metal loop. Their tiny size makes them the most inconspicuous and imperceptible form of permanent hair extension available in the industry today. Normally, only Remy hair is used to ensure the naturalness and longevity of the hair extensions, therefore, they are usually more expensive than other types of hair extensions.
Based on the shape of the keratin tips, we have the following types of keratin tip hair extensions. In addition to Nano Ring, there are often additional types such as: Flat-Tip, I Tip, V Tip, U Tip, Y-Tip, Micro Ring, and Plastic Nano Ring.
Why Choose Nano Ring Hair Extensions? – The Biggest Difference
- The main advantage of the nano ring hair extension is that its bonds are incredibly tiny. The nano ring itself (as the name suggests) is very small and is 90% smaller than a traditional micro ring. Currently, nano rings are considered one of the smallest links available.
- When expertly applied, nano ring hair extensions offer remarkable durability due to their precise strand-by-strand joining method. By carefully selecting and incorporating the correct amount of natural hair into each ring, the extensions achieve a sturdy and seamless integration with the existing hair. This meticulous application ensures a flawless and natural-looking result.
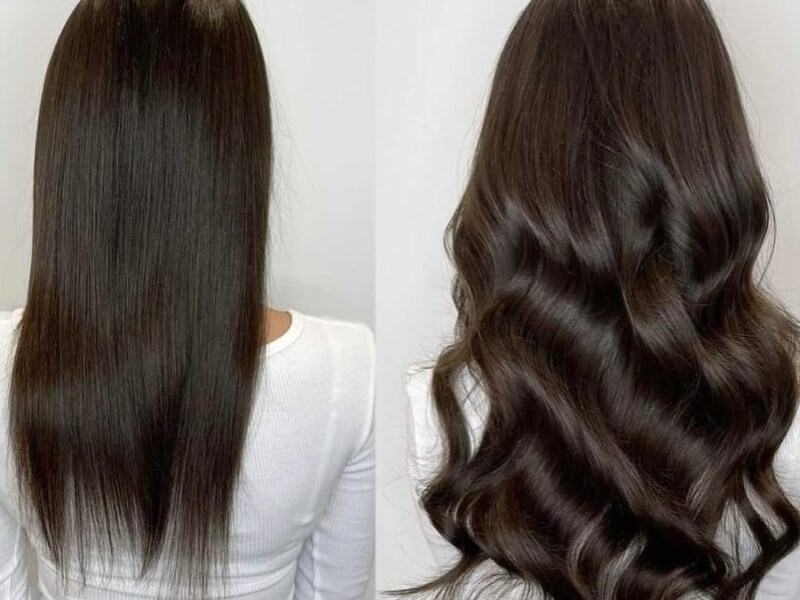
- Nano Ring Hair Extensions offer versatility in styling, allowing you to achieve various looks, from adding length and volume to creating intricate hairstyles.
- This is considered a safer hair extension method than other methods such as tape-ins, weft hair extensions,… because they do not require heat or glue for attachment.
Nano Ring Hair Extensions – The Best Choice For Thin Or Fine Hair
Nano ring hair extensions are the ideal solution for people with fine or thin hair who are struggling to find the right hair extension method. Unlike other methods like wefts, which can easily show up on thin hair, nano rings offer a discreet and seamless look.
The main advantage of nano ring extensions lies in their small size, making them significantly less noticeable even on thin and sparse hair. Tiny nano-rings are discreetly attached to small sections of natural hair, providing a seamless blend that is virtually undetectable to others.
Are Nano Ring Hair Extensions Damaging?
Nano ring hair extensions, when applied by a skilled professional, are not harmful to the natural hair. In fact, they are among the least damaging methods of hair extensions available.
One of the primary reasons nano ring extensions are gentle on the hair is that they do not require heat or glue for attachment. Instead, the tiny nano rings are clamped securely onto small sections of natural hair, minimizing stress and potential damage.
Furthermore, nano ring extensions are also gentle on the hair during removal. Unlike pre-bonded methods that often require alcohol or acetone-based removers, nano ring extensions can be removed without harsh chemicals.
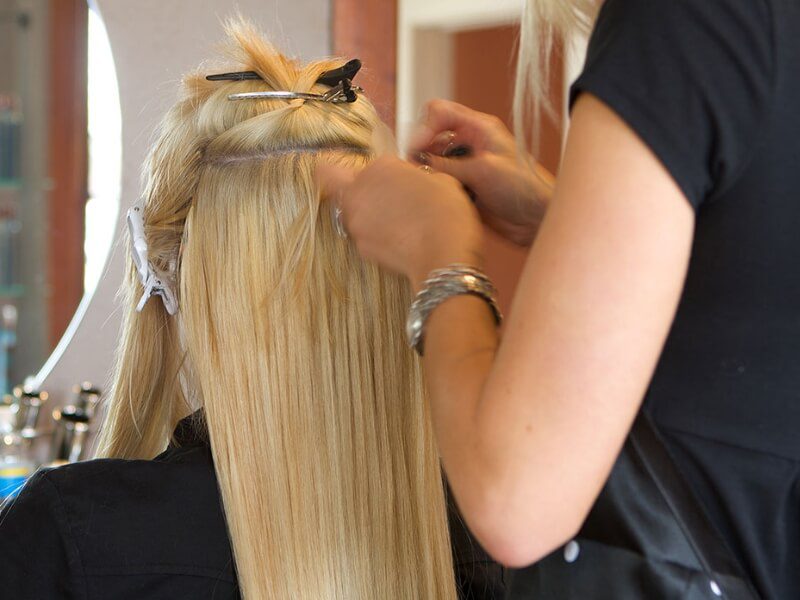
However, installation, maintenance, and removal of nano ring hair extensions must be performed by a reputable and trained professional. A skilled stylist will ensure that the extensions are applied correctly and with minimal tension, preserving the health and integrity of your natural hair throughout the process.
How Long Do Nano Ring Hair Extensions Last?
Nano ring hair extensions typically have a lifespan of three to four months with regular maintenance appointments.
Due to the small size of the nano rings, they require more frequent maintenance compared to other hair extension methods. So there may be times when some do slip and are even lost between hair maintenance appointments, which is perfectly normal and to be expected. It’s recommended to schedule maintenance appointments every three to four weeks to ensure the extensions remain in optimal condition and to maximize their longevity.
In contrast, traditional hair extension methods like pre-bonded and microbeads typically require maintenance appointments every four to six weeks.
With proper care and regular maintenance appointments, you can keep your extensions looking beautiful and vibrant for a long period.
Where Should You Buy Luxshine Hair Nano Ring Hair Extensions?
When it comes to purchasing Nano ring hair extensions, selecting the right Vietnam hair supplier is crucial to ensure you receive high-quality products and excellent customer service. Among the numerous options trong ngành công nghiệp tóc, Luxshine Hair stands out as a trustworthy destination for wholesale customers seeking top-tier Nano ring hair extensions. Here’s why:
Superior Product Quality
Luxshine Hair is renowned for its unwavering commitment to excellence. Our Nano ring hair extensions are meticulously crafted from 100% Vietnamese human hair, guaranteeing a natural appearance, luxurious feel, and exceptional durability that exceeds expectations.
Diverse Designs and Options
With Luxshine Hair, the possibilities are endless. Choose from an extensive selection of over 40 colors, ranging from classic to vibrant tones, ensuring a seamless blend with your natural hair. Additionally, our extensions are available in lengths ranging from 18 to 24 inches, and we offer straight, wavy, and curly textures to accommodate all your styling preferences.
Customization Services
Luxshine Hair takes pride in our ability to customize products to meet the unique needs and preferences of our customers. Whether you’re a salon owner, wholesale vendor, or distributor, we offer both ODM and OEM services, allowing you to create bespoke hair products tailored to your brand and clientele.
Exceptional Customer Support
At Luxshine Hair, customer satisfaction is our top priority. Our team of hair extension experts provides professional guidance and support at every stage of the purchasing process, ensuring you receive personalized assistance to select the perfect type, length, and color of Nano ring hair extensions to suit your specific preferences and requirements.
Competitive Factory Pricing
As a vertically integrated hair extension company with our own state-of-the-art manufacturing facility, Luxshine Hair is able to offer competitive factory pricing without compromising on quality. By eliminating middlemen, we pass the cost savings directly onto our customers, making our premium Nano ring extensions a cost-effective investment for wholesale buyers.
Sum up
Nano ring hair extensions are a great invention. If you would like to know more about nano ring hair extensions or would like advice on all things hair extension related, check Luxshine Hair – the leading Vietnamese hair vendor. We set ourselves apart by creating differentiated products and services as I mentioned in the article. So, don’t hesitate to stop by and check out our collection of Nano Ring Hair Extensions in particular and hair extensions in general. Please order on the website luxshinehair.com or contact us directly at (+84)862552088 for a free consultation!!!