How To Make I-tip Hair Extensions From Scratch Step By Step
- Emily LuxShine
- Last updated April 23, 2024
I tips hair extensions are one of the most wonderful inventions for women who want to add more color, lengths, or experiment with new textures. However, sometimes this technique of attaching single strands onto your client’s real strands may make you have very unique strands requirement. How to make I-tip Hair Extensions from scratch? Below we will provide instructions for you. While the method is not at all difficult or complex, it will certainly take some practice and experimentation to get the perfect results that you might want and love.
The Basic Stuffs For How To Make I-tip Hair Extensions From Scratch Process
Before we start with the process, let’s understand the products we are trying to craft, what is the source material, as well as why would someone decided to take the DIY route, instead of ordering something ready-made.
What are I-tip hair extensions?

The I-tip hair extension, sometimes also known as cold fusion. This type of keratin tip hair extension is done by using a traction tool to pull the client’s hair through a small loop. The traction used can either be a hook or a ring. The hairstylist will then insert the i-tip extensions into the small loop and then compressed the loop with a special plier. This force of compression will then crush the keratin and keep everything in place.
What is bulk hair?

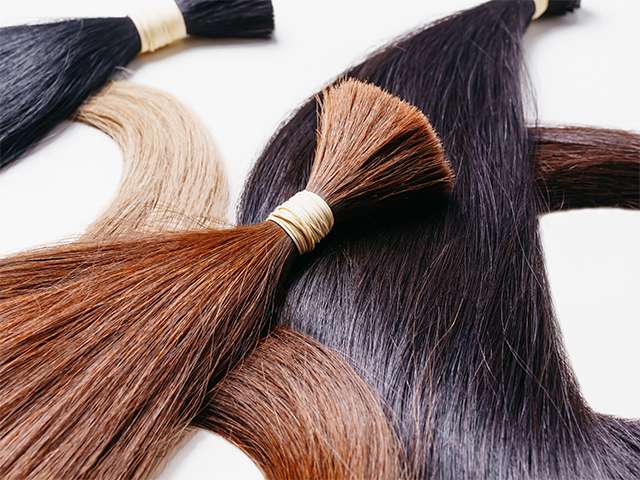
To make i-tips hair extensions from scratch, you will need to use bulk human hair as the starting material. So what is bulk hair? Here is our definition. Bulk hair is what you get when you collect hair material from donors and sellers. They are natural bundles of hair cut with the same cuticle alignment. These naturally aligned cuticles is what valuable about these hair bundles. From these bundles, hair strands are then transformed into all kinds of hair extension products that you know and love.
Why would you want to make your own I-tip hair extensions from scratch
Even though we as well as many other human hair suppliers sell all kinds of I-tip hair extensions imaginable, some hair salons still have the incentive to make their own I-tip hair extensions from scratch. Here are a few reasons why they might want to do so:

- To better manage the peak and trough in demand: sometimes having hair in bulk means the hair salon can manage their hair material stock better and have a clear visualization of when they might need a restock of different kinds of color, length, or texture.
- To easily customize the color and weight of the hair strands. Since our factory has a rigorous quality standard, a certain range of weight for these I-tips is required. If your demand and requirement fall outside of our predesignated range, then you might need to learn how to DIY. This is also true for your color requirement.
- You might also want to mix up your human hair bulk material with some other kind of hair material before you start creating your hair strands. Having hair material in the bulk form allows you to achieve the ultimate flexibility.
- Cost-saving: I-tip hair extensions aren’t cheap so if you want to save cost, you might want to do them all by yourself. If you are a business that is just starting, or you have people who can do this process for you, the cost-saving aspect might worth investigating.
The Tools You Will Need For How To Make I-tip Hair Extensions From Scratch
To make I-tip hair extensions, you don’t actually need much equipment. Please gather these tools to get started.
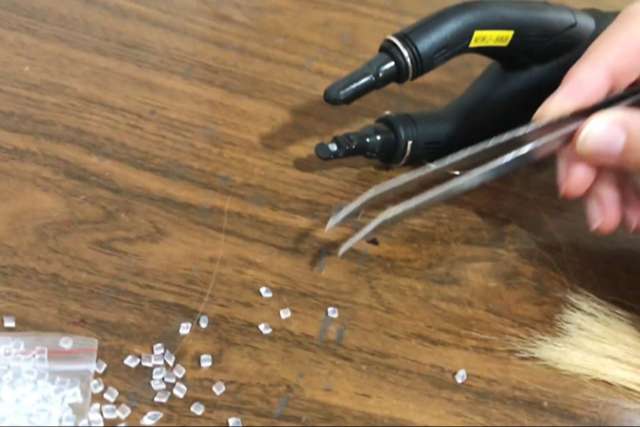
- A bowl of Italian keratin beads
- A pair of tweezers
- A heat application tools
- Some bundles of bulk hair ( Luxshine’s deep wave bulk hair bundles)
Steps By Steps Guide On How To Make I-tip Hair Extensions From Scratch
Step 1: SeparatingThe Strands From The Bulk
Separating a certain amount of hair, enough for your client’s need that can also go through the loop easily. Most people can start with taking out what is equivalent to 1 gram of hair.
Step 2: Melt Your Keratin Bead

Use your tweezer to put some keratin beads onto your heat application tool. Be very careful not to burn your hand in this step. Leave them there for a few seconds for the keratin to melt.
Step 3: Apply The Glue And Finish

Glide the tools over the hair over and over again until all of the strands are covered with glue. One sign that signifies that your hair is all covered in glue is the uniform shininess that the head gives off. Cut off the top from the hair tip to create a perpendicular line. You will then twist the hair in your finger to roll them up. Voila! Now you have already made one single strand. Depend on your speed, you will be able to make from 50-100 strands in an hour.
Additional Tips
- You can separate the hair in advance into separate strands so that your product appears uniform and better looking. This also helps you focus on step 2 and step 3 continuously.
- You should be prepared to wait for the keratin bead to melt in order to have it applied to the hair thoroughly. If you are not ready to wait, you can alternatively, dip the hot tip into the bowl, and continue to use the applicator.
- If you don’t have the heat application pliers, another option is to use your flat iron. However, this option is usually less than ideal.
Above is a guide on how to make i-tip hair extensions from scratch that you can refer to. Luxshine carries many kinds of single-strand hair extensions and 99% of the time, we got something that would satisfy our customer’s needs. Whether you want nano tip hair extensions, I -tip hair extensions, flat tip hair extensions or any Vietnam hair extensions we’ve got you covered.

I am Emily, now CEO of Luxshine Hair, with over 10 year of experience in the hair extensions and beauty industry. I would love to share my useful knowledge about hairstyles, hair care, applications for hair extensions, and wigs. I hope, with my passion and experience, I can be able to help not only handle customer’s concerns effectively but also elevate their hair game to new heights.

