Bleaching Knots on Lace Closures: A Must-Have Skill for a Flawless Look
- Emily LuxShine
- Last updated July 17, 2024
You’ve just ordered a lace closure online based on a friend’s recommendation, eager to try it on. However, before you can start with your net cap, needle, and thread, there’s an essential step you need to tackle first: bleaching the knots. If you’re unsure what this entails, don’t worry. This guide will walk you through the process and its benefits, ensuring your lace looks as natural as possible.
Understanding Knots on Lace Closures
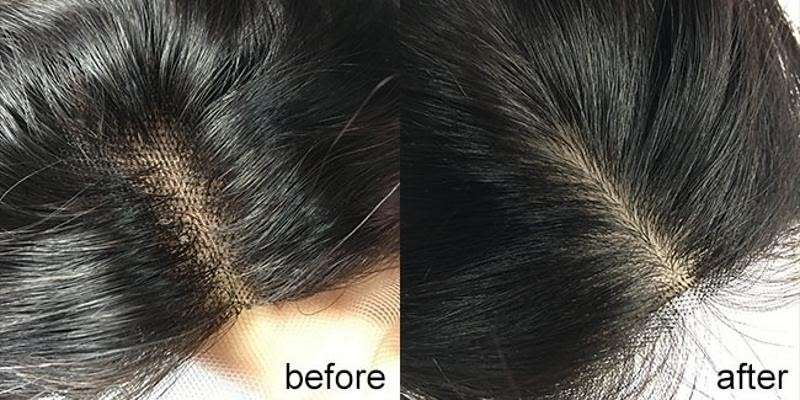
When you closely examine your lace closure, you’ll notice dark knots where the hair strands are tied to the lace. These knots are created during the ventilation process, where individual hair strands are manually tied to the lace using a crochet hook. While this ensures the hair stays firmly in place, these tiny knots can be quite visible, forming a grid-like pattern that many find unattractive. Bleaching these knots can make them less noticeable, giving your lace a more natural appearance.

Why Bleach Knots on Lace Closures?
Bleaching knots on lace closures is essential for several reasons:
- Natural Appearance: Bleaching removes the dark pigments from the knots, making them blend seamlessly with your scalp. This gives the illusion that the hair is growing directly from your scalp.
- Enhanced Aesthetics: A well-bleached lace closure looks more realistic, even when observed up close. It eliminates the grid pattern, providing a smooth and flawless finish.
- Increased Confidence: Knowing that your lace closure looks natural boosts your confidence, allowing you to wear wigs and sew-in units with pride.
Step-by-Step Guide to Bleaching Knots
Follow these steps to bleach the knots on your lace closure effectively:
Step 1: Turn your closure or frontal inside out. Place it on a foam headpiece and clip away all the baby hair. Pin down any extra hair to keep it out of the way.
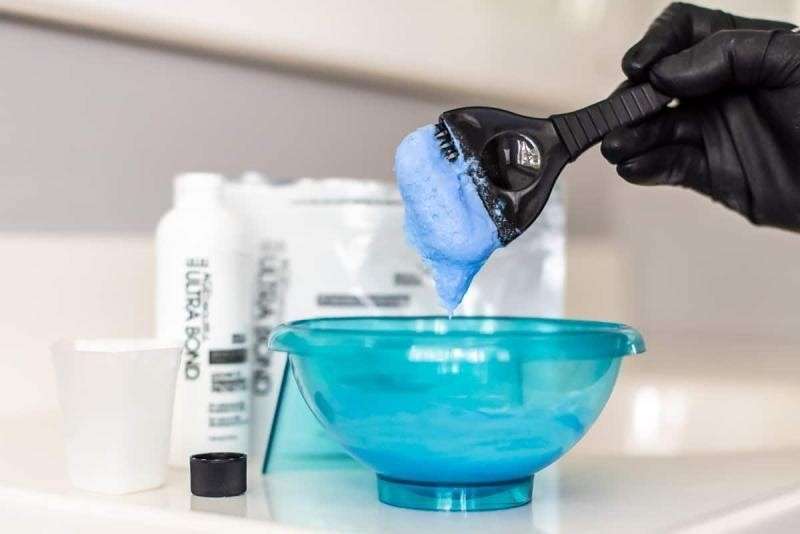
Step 2: Mix the developer and bleach powder in a 1:1 ratio in a mixing bowl. Stir until the mixture is thick and free of lumps.

Step 3: Using a brush, gently apply the bleach mixture to the lace. Avoid applying pressure to prevent the bleach from seeping through the lace onto the hair.
Step 4: Cover the entire lace surface with the bleach mixture to ensure uniform bleaching of the knots.
Step 5: Wrap the lace closure in aluminum foil to allow the bleach to lift the pigment from the knots. Wait and monitor the lace until the knots turn an amber-brown color.
Step 6: Once the knots reach the desired color, rinse the bleach out quickly, keeping the closure upside down to avoid getting bleach on the hair. Use a neutralizing shampoo to stop the chemical process, leaving it on for 5-10 minutes. Finish with a conditioner to keep the hair moisturized.

Pros and Cons of Bleaching Knots on Lace Closures

Pros:
- Achieves a natural-looking hairline
- Eliminates the visibility of dark knots
- Enhances the realism of wigs and sew-in units
- Increases confidence in wearing lace closures
Cons:
- Potential damage to hair strands if not done correctly
- Risk of increased hair shedding
- Requires skill to apply the bleach mixture properly
- Over-bleaching can weaken the hair roots
- Bleach can make hair dry and brittle, necessitating conditioner use
Alternative Methods
If bleaching knots seems daunting, there are other ways to achieve a natural look for your lace closure. Makeup and concealers can help blend the lace with your scalp, masking the dark knots without the need for bleach. We will cover these techniques in future guides.
For now, we hope this guide provides you with the knowledge and confidence to bleach the knots on your lace closure, ensuring a flawless and natural look. If you have any questions or need further assistance with installing or customizing your lace closures, feel free to reach out. Luxshine Hair, a reputable Vietnam hair vendor, is always here to support you in your journey to perfect hair.
By following this guide, you’ll master the art of bleaching knots, enhancing the appearance of your lace closure and boosting your confidence. Happy styling!

I am Emily, now CEO of Luxshine Hair, with over 10 year of experience in the hair extensions and beauty industry. I would love to share my useful knowledge about hairstyles, hair care, applications for hair extensions, and wigs. I hope, with my passion and experience, I can be able to help not only handle customer’s concerns effectively but also elevate their hair game to new heights.

