7 Simple Steps Of I Tip Extensions Installation Guide
- Emily LuxShine
- Last updated June 3, 2024
Are you looking to add length and volume to your hair? Keratin I tip hair extensions might be the solution you need. Known for their versatility and durability, these extensions offer a natural way to enhance your look, whether you aim for a dramatic change or simply enjoy experimenting with different hairstyles. In this guide, we’ll explore Keratin I tip hair extensions, how to install and care for them, and why they’re a popular choice for a stylish look.
Understanding Keratin I Tip Hair Extensions
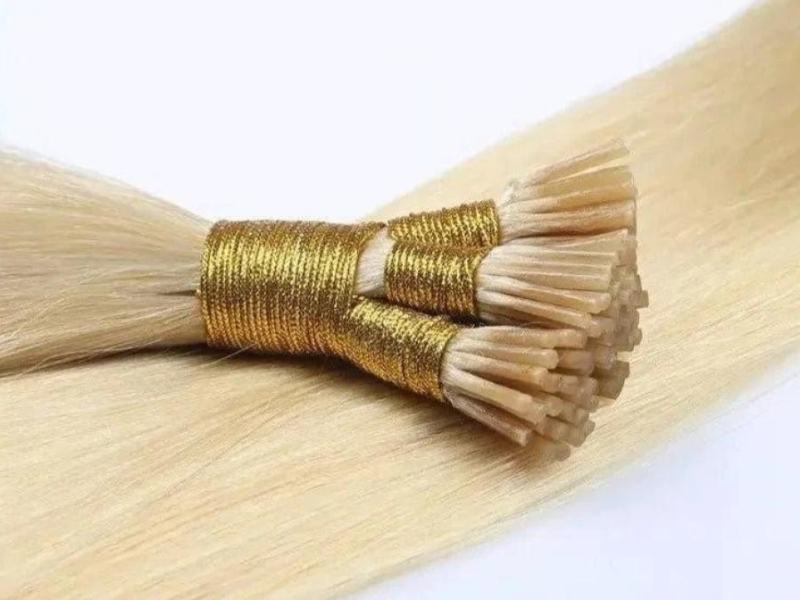
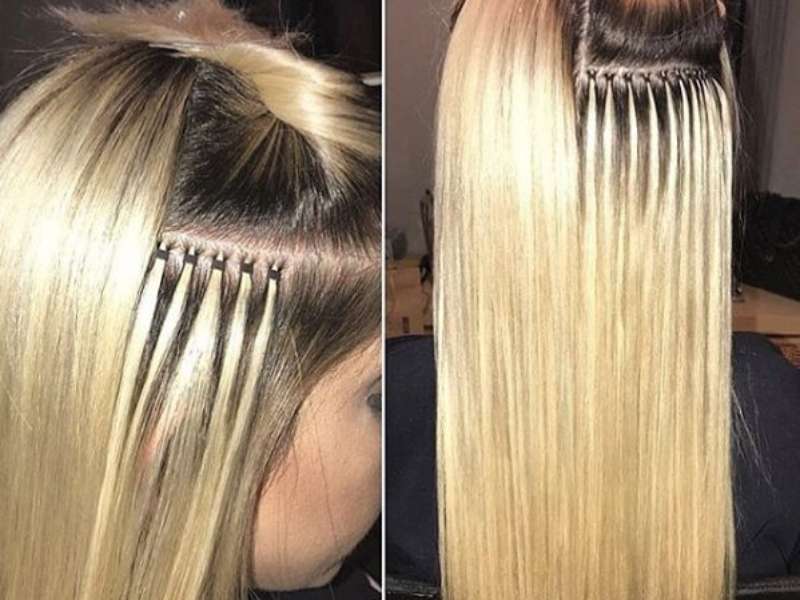
Keratin I tip hair extensions come with small keratin bonds at their tips, making the attachment process straightforward. Keratin, a natural protein found in hair, forms a secure and durable bond between the extension and your natural hair.
The keratin bonds are shaped like the letter “I,” enabling a discreet and effective application. This design ensures a seamless and natural look, creating a cohesive appearance with your natural hair.
Typically made from high-quality, 100% human hair, these extensions blend seamlessly with your existing hair. They can be dyed and styled easily, allowing for customization without the mess.
Prepare Tools for I Tip Extensions Installation
3-in-1 Pulling Needle
- This versatile tool efficiently sections hair, attaches micro rings, and pulls your natural hair through the micro rings.
Micro Tube Rings
- These small, durable rings are essential for securing the extensions to your natural hair, ensuring a long-lasting hold.
Plastic Tubes
- Plastic tubes protect your natural hair during installation, ensuring a smooth, friction-free process.
Pro Fusion Tool
- Designed for attaching I tip hair extensions seamlessly, this tool’s precision and ergonomic design ensure a clean, natural fit.
Loop Pulling Needle
- This tool effortlessly guides your natural hair through micro rings or tubes.

Having these tools prepared and organized before starting ensures a smooth, professional, and seamless I tip extensions installation.
How to Install I Tip Hair Extensions Step by Step
Keratin hair extensions are distinguished by their unique application process. Here’s a step-by-step guide:
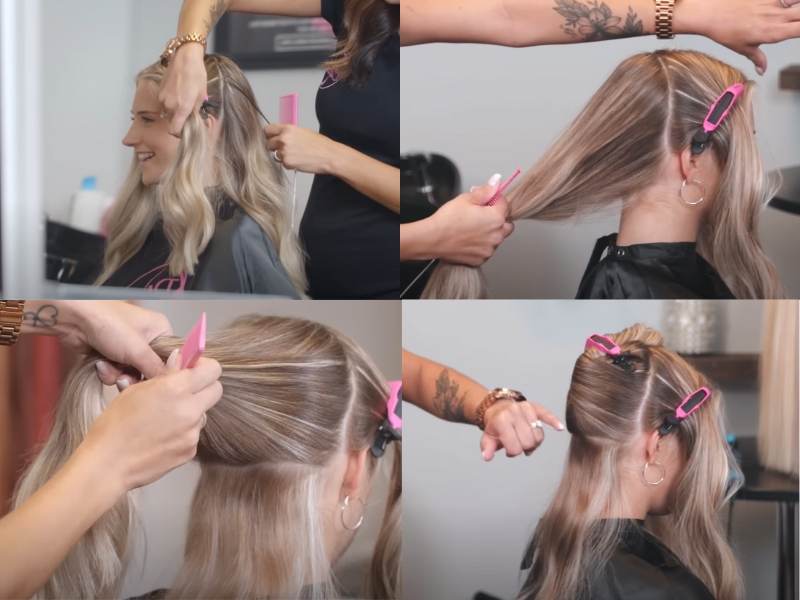
Step 1: Hair Sectioning
Part your hair using a comb. Create sections where the extensions will be placed, ensuring a systematic approach.
Step 2: Prepare Pulling Needle with Micro Ring
Thread micro rings onto the hook part of a pulling needle. Ensure the rings are securely attached.
Step 3: Determine Installation Points
Use the pulling needle, now equipped with micro rings, to grab a section of your natural hair. Prepare to pull the hair through the micro ring.
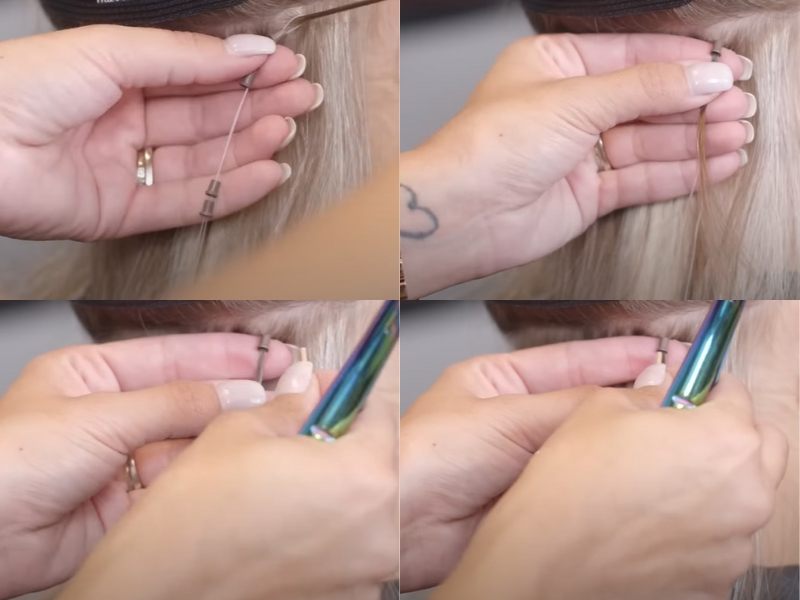
Step 4: Pull Hair Through Micro Ring
Hold the micro ring in place with one hand and use the pulling hook with the other to pull your natural hair through the ring, ensuring a stable foundation for the extension.
Step 5: Insert I Tip Extension
Insert the I tip extension between the micro ring and your natural hair. Ensure a snug fit for a natural look and comfortable wear.

Step 6: Clamp the Micro Ring
Slide the micro ring about 1/2 inch from the scalp. Use the extension tool to tightly close the ring, securing the extension.

Step 7: Repeat Process
Repeat the process strand by strand until all the extensions are applied.
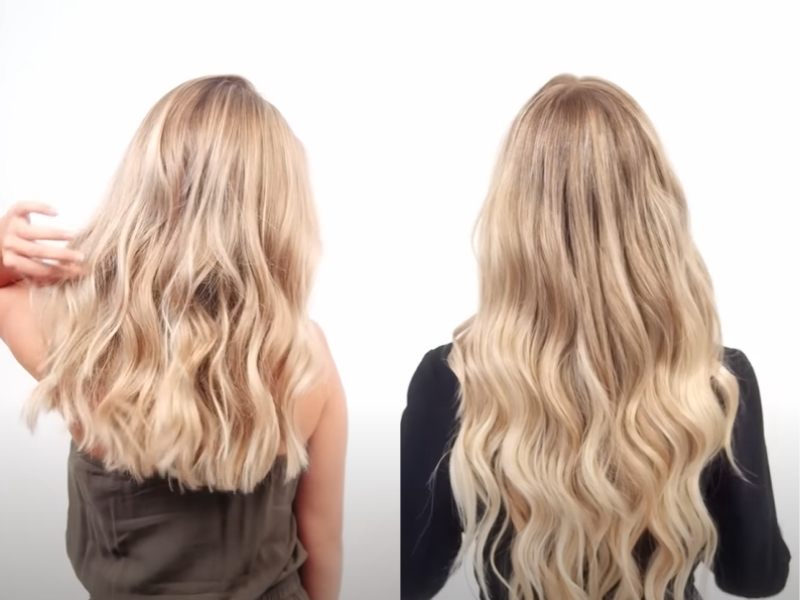
By following these steps, you can confidently install I-tip hair extensions for a professional-looking result. However, it is recommended to seek the help of a professional hairstylist for the installation to ensure safety and optimal results.
Below is a detailed video on I-tip hair extensions installation for further guidance. Let’s watch:
See more related post here: I-Tip Hair Extensions Pros And Cons
Caring for I Tip Extensions After Installation
To keep your Keratin I-tip hair extensions in top condition, follow these care recommendations:
Choose Sulfate-Free Shampoo
Use sulfate-free shampoos to maintain the integrity of the keratin bonds, ensuring longer-lasting extensions.

Gentle Detangling
Use a wide-tooth comb or a specialized extension brush to detangle your hair. Start from the ends and work your way up to the roots. Avoid pulling or yanking to keep the I-tip links intact.
Minimize Heat Damage
While styling with heat is possible, excessive heat can weaken the keratin bonds. Use heat protectant products and lower heat settings to protect your extensions.
Regular Maintenance Appointments
Schedule regular maintenance appointments with your stylist to ensure the secure attachment and overall condition of your extensions. Regular check-ups help resolve potential issues and prolong the life of your Keratin I-tip hair extensions.
5 Hairstyles with I Tip Hair Extensions
After installing I-tip hair extensions, you can achieve a variety of versatile hairstyles:
Voluminous Loose Waves
Add length and volume with I-tip extensions. Style your hair into loose waves using a curling iron or flat iron. The extensions will blend seamlessly with your natural hair, creating a glamorous and voluminous look.

High Ponytail
Gather your natural hair and I-tip extensions into a high ponytail. Wrap a piece of the extension around the base to cover the hair tie. You can also use clips or scrunchies to secure it.

Braided Crown
Incorporate the I-tip extensions into your hair and form a crown braid. This elegant hairstyle is perfect for special occasions, adding volume and making the crown braid stand out.

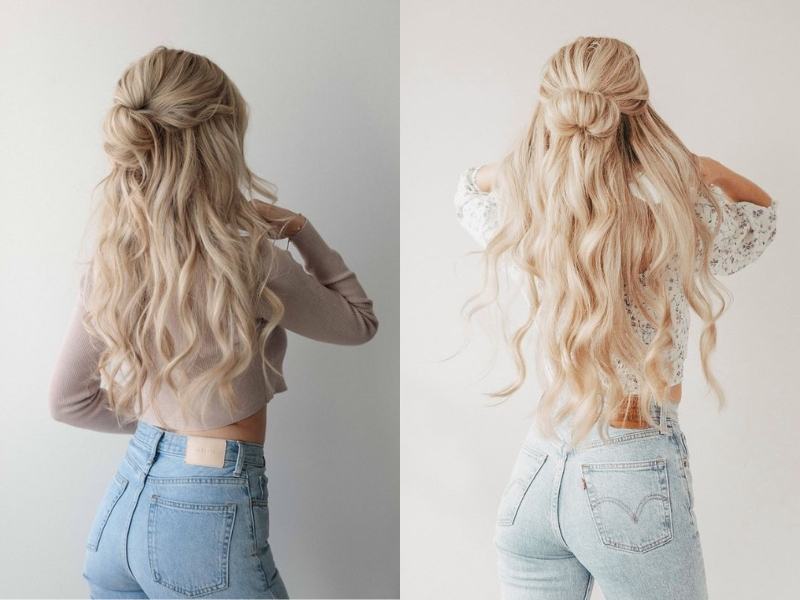
Half Up Half Down Bun
Create volume at the top of your head with extensions, then gather the top half into a bun. This style combines simplicity and elegance.
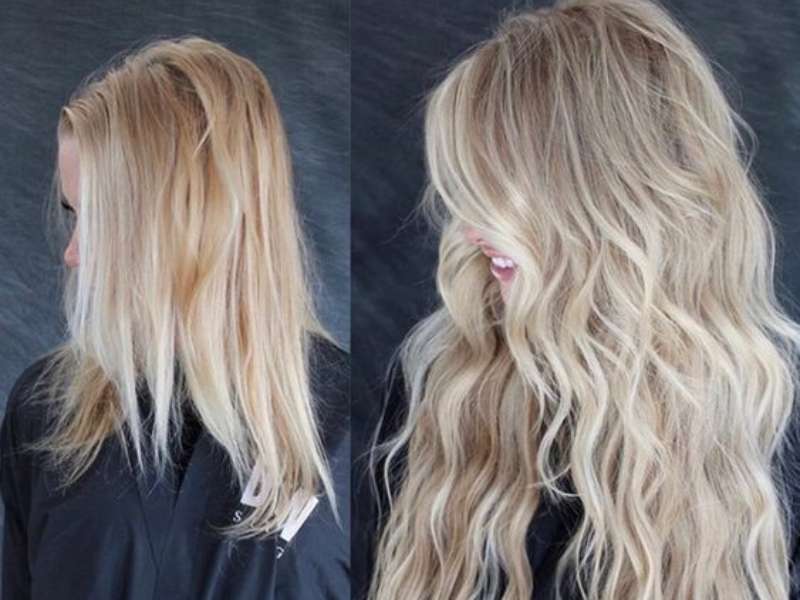
Messy Waves
Style your hair into loose, messy waves using a texturizing spray. The extensions enhance the texture and volume, giving you a relaxed and natural feel.
Keratin I-tip hair extensions offer a versatile solution for those seeking a change. With their natural look, durability, and styling freedom, they are a top choice for hair salons. Don’t hesitate to buy Keratin I-tip extensions at Luxshine Hair. As the largest hair supplier in Vietnam with over 20 years of experience, we provide free consultations on color and length to best suit your needs. You’ll be satisfied with our products and services.

I am Emily, now CEO of Luxshine Hair, with over 10 year of experience in the hair extensions and beauty industry. I would love to share my useful knowledge about hairstyles, hair care, applications for hair extensions, and wigs. I hope, with my passion and experience, I can be able to help not only handle customer’s concerns effectively but also elevate their hair game to new heights.

